Showing posts with label Tutorial. Show all posts

Thursday, June 13, 2013

Paper Piecing My Way

B-6
Dear Jane, B-6

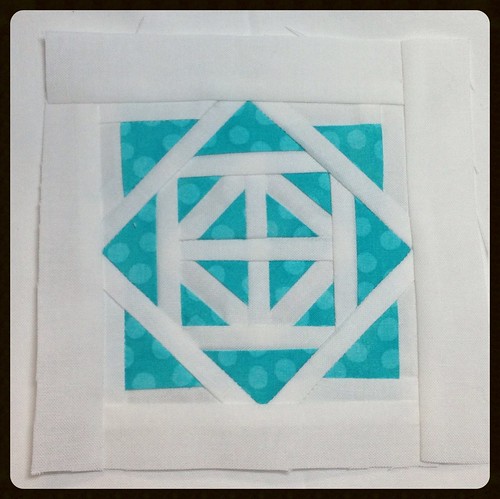
I finished another Dear Jane block last night.  I thought while I was doing it I would snap a few pictures and describe my way of paper piecing.  This isn't meant to be completely in depth because it was last minute but if people want me to I can do a more in depth description with a simpler block.

To start, I use freezer paper. (I like this kind, Quilter's Freezer Paper Sheets) And I don't stitch through the paper, ever.  Can you imagine cleaning paper out of all those seams in that block above.  Keep in mind, that block is only 5".  Each of those white pieces in the middle are only a 1/4" wide.  I find the method I do to be particularly helpful with small pieces.  Another helpful hint when doing this method is that you DO NOT have to reverse or mirror image your design.  
Untitled

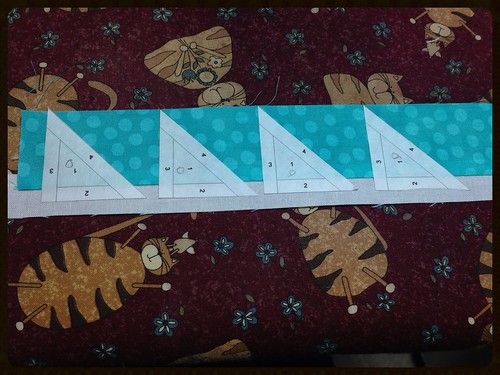
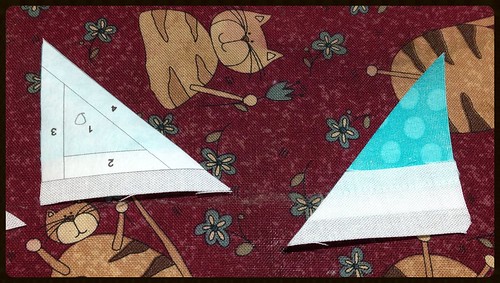
The first thing I do is trim my sections down so that they are in standard sections you use in paper piecing.  You can see that in the picture above.  I didn't take a picture with them all cut out.  I cut off the seams too and you will see why in a bit.  The four pieces above are the corner pieces.  To speed things up I like to find pieces that are the same and piece them all at one.  Here I am working on pieces 1 and 2 in these sections.  I pieced together long strips and then ironed my freezer papers on the strip.  It saves me from doing four separate seams.  I am only worried about having enough room for pieces 1 and 2.  I take this piece to my cutting board and trim them down.

Untitled

These are the pieces after I trim them down.  When you trim you need to make sure you have a 1/4" seam all around the sections you are working on.  It just happened that sections 3 and 4 are 1/4" wide so I trimmed to the edges.  The paper is on the top of my pieces instead of the back like it normally is with traditional paper piecing.  The piece on the right hand side is the back.  If you look closely you can see my seam.  

Untitled

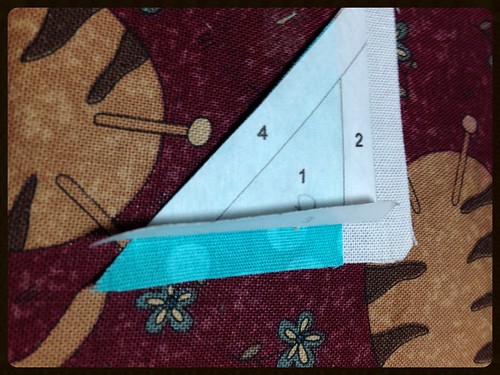
The next piece we need to put on is section 3.  I use a ruler and fold that section back.  Sometimes I find it helpful to run a needle lightly along the line to perforate it. I then use my ruler and rotary cutter to make sure that the visible edge of fabric is a quarter inch.  So the aqua fabric under the three is exactly a 1/4" away from the fold line.


Untitled

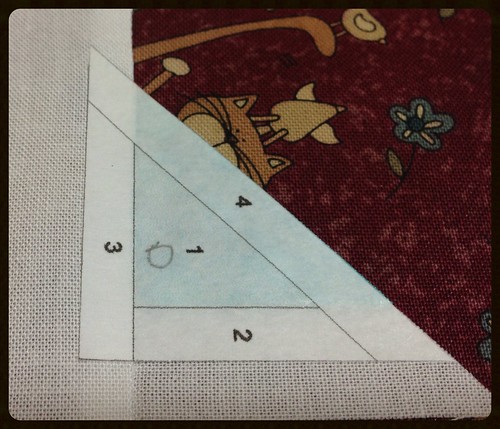
The next piece, section 3, is white so I take a piece of white and lay it right side down over my section lining up the edges and keeping the fold down.  You can see the paper folded up.  I bring this to the sewing machine and sew a 1/4" seam where the edges line up.  You should not hit the paper here if you trimmed correctly and can sew an accurate 1/4" seam.  With lighter fabrics you can actually see the paper under so you know where the fold is.

Untitled

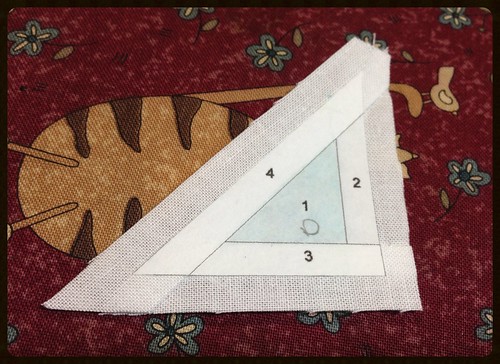
After sewing the seam I take the piece to my ironing board and iron it down.  We now have section 3 right where it belongs.  Now I fold back section 4, trim to 1/4", place another fabric and sew the seam.
  Untitled

Here is this section all done.  Remember to leave a seam allowance around your block because its not included in the paper piece.
Untitled

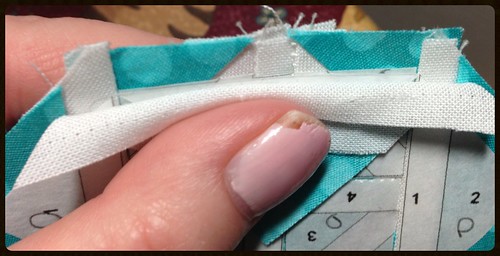
This is how I sew the sections together.  I pull back one of the seams and line up the paper.  If you look closely you can see the two pieces of paper next to each other.  (Please ignore my chipped manicure)  They are not quite lined up here.  The hardest part of this method is getting those lined up and to the sewing machine that way.  I do not like to pin as I feel like it distorts things with so many layers and the paper.  Sometimes I glue baste my seams with an elmer's glue stick if I am having a real hard time.  I very often start the seam and double check it as I am sewing by lifting up the top piece.
Untitled

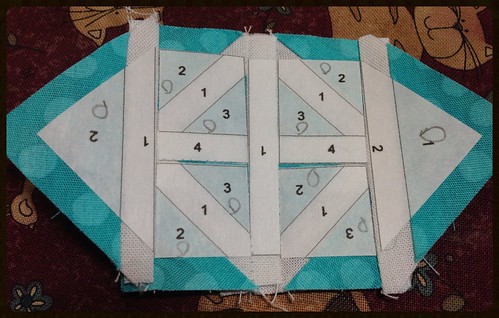
This is a section of my block all done.  You can see that there are little gaps.  You can choose to resew those if you want.  You don't need to unpick.  Just sew again a thread closer.  Sometimes, depending on the piece you can just pick the freezer paper off and move it closer and re-iron.  You might need to trim again if you do this.  I didn't do this because then my white strips in the diamond would not have lined up.

I know with this method of the freezer paper being on top it makes it hard to see if your seams line up.  But it's freezer paper.  You can take it off, check your work and iron it back on. The reason I like the paper on the front is because its not on the back in all the seam allowances.  This gets it out of the way.  I find it easier to be more accurate when there are small pieces.
  Untitled

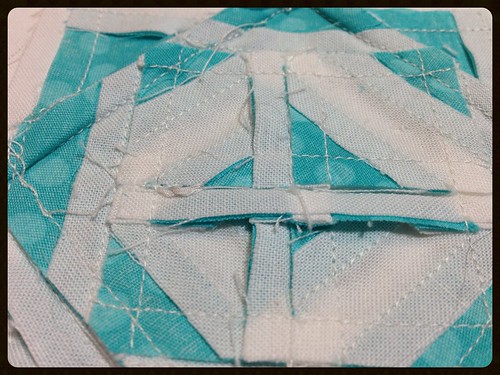
This is the back of my block.  Look at all those seams!


B-6

Here it is again all done.  If you look closely you can see that its not perfect.  One of the aqua corner pieces came out too small.  I most likely didn't have a correct 1/4" seam somewhere there.  I am trying to decide if I should fix it but I probably won't.  In this quilt it won't be that noticeable when it is finished. 

I learned how to do this method by combining several different ways.  I learned to paper piece with the freezer paper on the back and that's how I originally did it.  You can see a great tutorial of that here. Then I started working on a Cynthia England design and she paper pieces with it on top but she cuts out each individual piece and then pieces them together instead of folding back the paper.  Kind of like just using the freezer paper as a template.  I find my method a bit faster.  Especially when you can strip piece and do several sections at once.  This block took me about 1 hour and 45 minutes to do.  And that was with taking pictures and tucking the kids into bed.  And bonus, I didn't have to sit there and unpick paper when I was done.  


I would like to hear what you think about this method.  There is possibly a tutorial out there doing this but I have not seen it completely this way.  I think you should give it a try.  If you have any questions please leave a comment or email me.  This was just a quick write up so I understand if something wasn't completely clear. I can describe any step of this more in depth in another blog post when I do my next paper piecing block.

Edited:  I forgot to add my links to Let's Connect Thursday and Crazy Mom Quilts.

Wednesday, May 1, 2013

WIP Wednesday 5/1/13


Last night I worked on getting another applique block prepped.  This is one of the Baltimore and Bali blocks from the block of the month I have been slowly plugging away at.  I can't seem to get a good picture of it. The colors are much better in person and way more vibrant.  I still have to make flowers that go on the end of the stems.  

They only other thing that worked on in the past few days is a few items for my daughter for her birthday.  I made some party gift bags and I made her a new tote for school.  


Untitled


I posted a tutorial yesterday for these gift bags.  You can find it here.  I am anxious to hear what people think of it.  Its my first tutorial for my blog.

Untitled

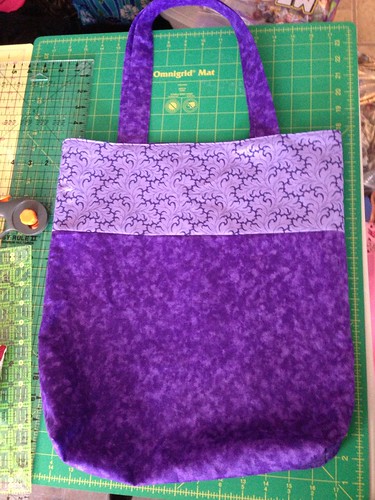
This is the tote I made her.  I learned how to make it in a free craftsy class.  


It was a great class.  I have made several of these bags.  You should check it out.  This bag only took about an hour.

Today I am linking up to Freshly Pieced.  

WIP Wednesday at Freshly Pieced

Tuesday, April 30, 2013

Gift Bags and a tutorial!

Untitled

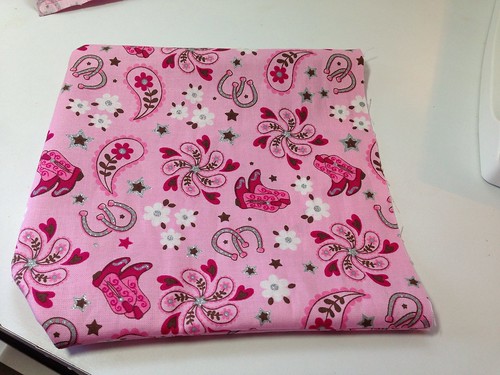
I was busy making gift bags this weekend for my daughter's 9th birthday party and I thought to myself that it would make a great tutorial to share on my blog.  This is my first tutorial so please let me know if anything more (or less) is needed.


Untitled

Step 1:
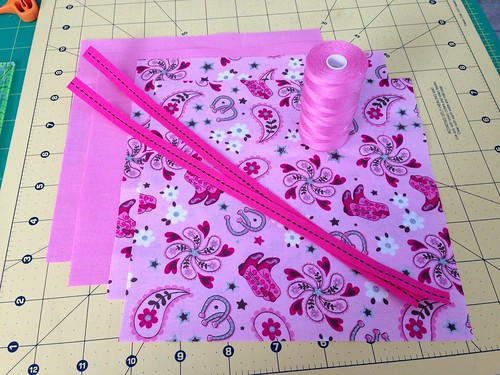
Supplies needed -
Lining - 2 - 7 1/2" Squares
Exterior - 2 - 7 1/2" Squares
             Handles - (2) 10" long pieces of ribbon.   (Just a quick note here.  I used a crossgrain ribbon.  Its woven and a little stronger and easier to sew with than the shiny kind of ribbon.  But be creative here.  You can really use anything you want.  A decorative rope or string of any kind would work.)
             Coordinating thread - I used Connecting Threads thread.  It was what I had in the color I needed.
             And general sewing supplies.  Scissors, ruler, cutting mat, pins, marking pen, etc.


Step two:
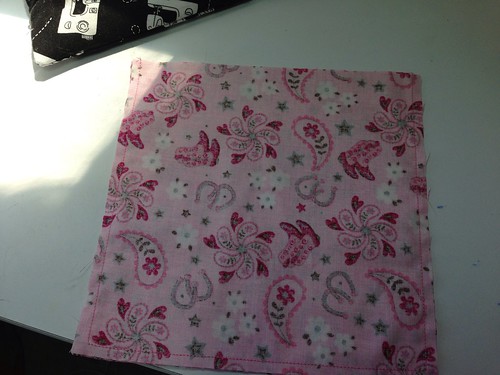
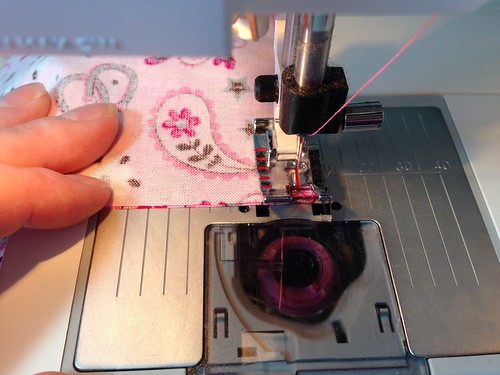
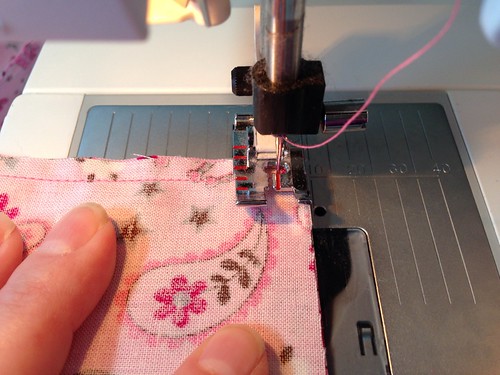
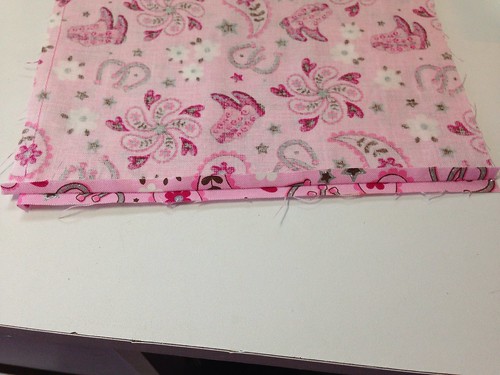
           Sew around the sides and bottom using a 1/4" seam.  Do not sew the top.  See the diagrams below.


Untitled

When you get to the corners pivot around them without stopping or cutting your thread by leaving the needle in the fabric and lifting the presser foot.  

Untitled

Untitled

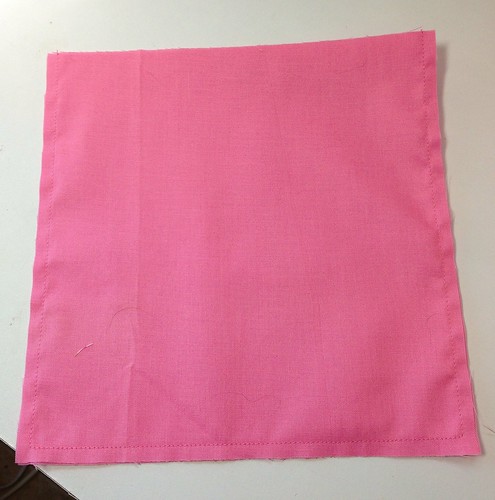
Do the same thing with the lining.


Untitled

After this you are going to want to iron both pieces.  I find it easier in the end to iron my seams open.  
Untitled


Step three:

  Turn the exterior portion of the bag right side out.  You don't need to be too picky about getting the corners  just right yet.  In this step we are just attaching the handles to the bag. 


Untitled

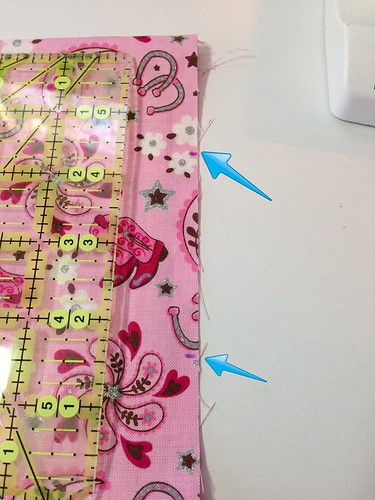
Using a ruler and a marking pen place small marks 2 inches from each edge of the bag.  This is where you are going to place your handles.  You will need to make marks on both sides of the bag.

Untitled

Untitled

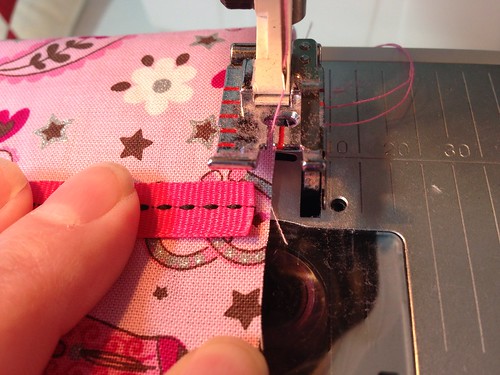
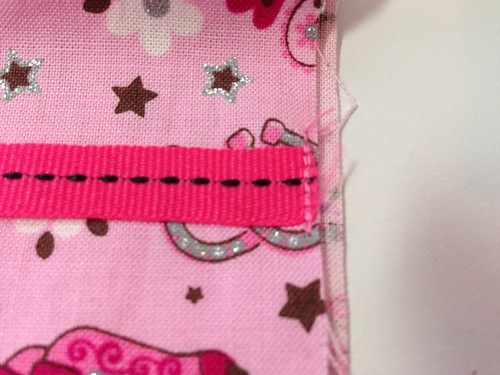
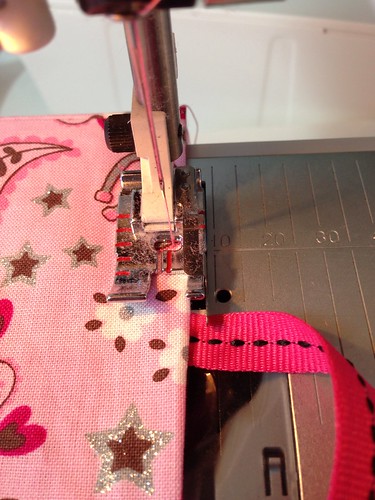
Next, we are going to attach the handles to the bag.  You can pin here but I don't.  I find the easiest way is to place your bag under the presser foot like above and then set the ribbon on top of your mark you made earlier.  I try to center it over the mark.  I find this part is easiest if you can use the free arm part of your sewing machine.  The bag fits just right around my free arm. (Believe it or not I did clean my machine before I started this but something I was using was horribly linty and I was actually making 12 bags all at once)

You are going to sew the ribbon to the bag using a small seam allowance.  Probably about 1/8" if you can.

Untitled

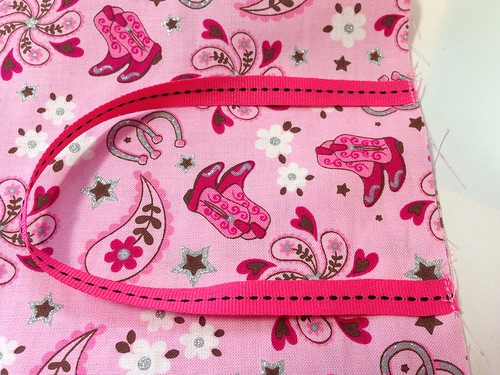
Now, you need to attach that same ribbon to the other mark on that same side of the bag.  Be careful here so that you don't twist the ribbon.  You want it to lay nice and flat.

Untitled

You need to do this same process again on the other side so that you have both handles attached.

Step four:

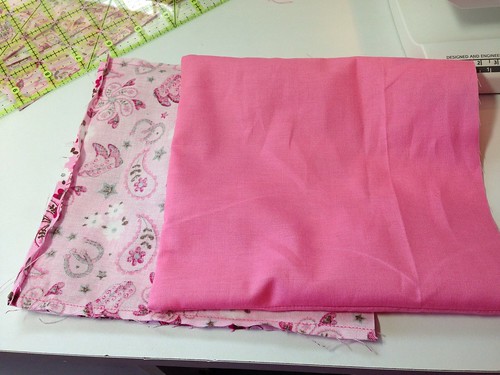
Turn the exterior of the bag so that it is inside out.
Turn the lining of the bag so that it is right side out.


Untitled

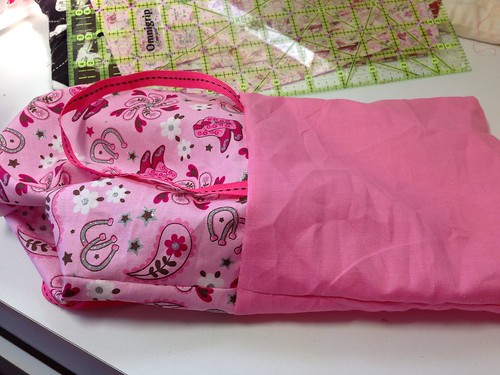
You are going to slide the lining of the bag into the exterior of the bag.

Untitled

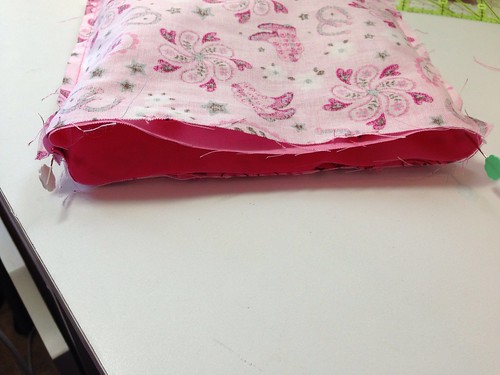
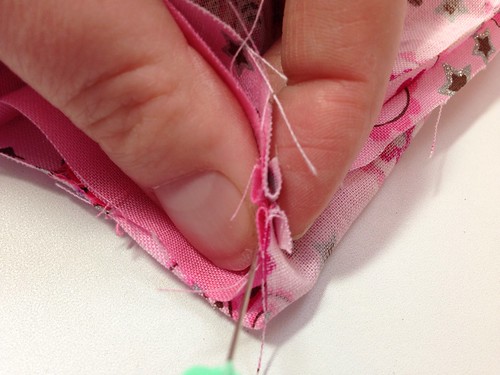
At this step you are going to need to pin the sides after lining up the seams.  This is where it is helpful if you have pressed your seams open.   You can see in the picture below how to line them up.

Untitled

I didn't take a picture of it but I found that it was easier if I used a couple more pins around the sides of the bag too.

Now, you are going to put the bag back on the sewing machine.  Now we are going to sew around the top of the bag using a 1/4" seam making sure the seams line up and stay flat on the sides.

Untitled
a>
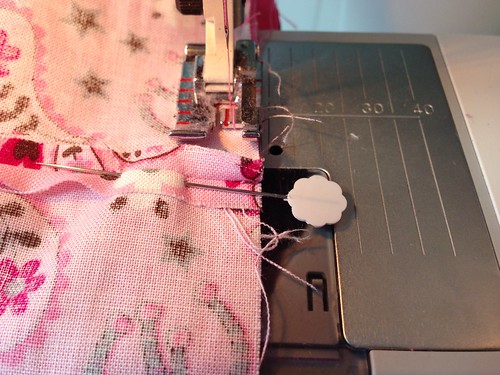
Start at a handle and ended at the other handle on the same side leaving a few inches open for turning the bag.  I did back track at the beginning and ending of my threads so I didn't pull any out when turning the bag.

Untitled

The sewing line goes all the way around the bag.  This is another area where having a free arm is helpful.

Step five:

Untitled

Now you are going to want to turn the bag right side out pulling it through the opening you left.  If you find it too hard you can leave the opening bigger if needed.

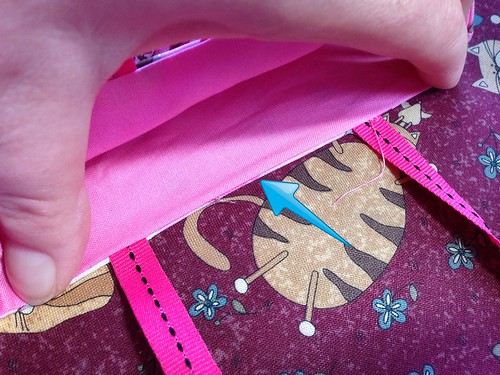
You are going to need to tuck the lining into the exterior of the bag.  It takes a bit to get the seam at the top to look nice.  I found using a pin to pull it out helped.  Play with it a few minutes and get it to where it looks nice.  When you are done you are going to want to iron around the top of the bag.  You will still have the opening there so be careful when you are ironing to make sure the edges are turned in.

Untitled

In the picture above you can see my opening after ironing around the top of my bag.  There are some small threads hanging out of it.

Untitled

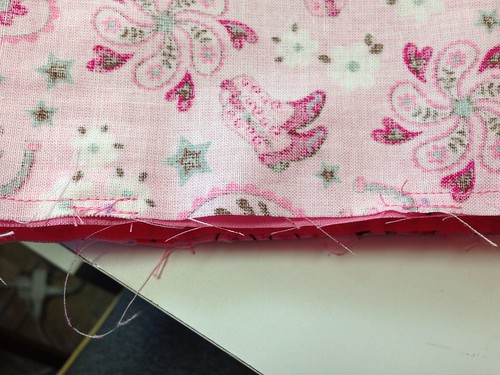
Next you are going to top stitch around the top of the bag.  This adds a nice finishing touch and closes the opening for you so you don't need to hand stitch it.  I used about an 1/8" seam.  I lined the top of the bag up with the inside of my quarter inch foot to keep it the same all around the bag.

You might need to take a pin and poke at the bottom corners to get them to look nice and be more square.


Untitled

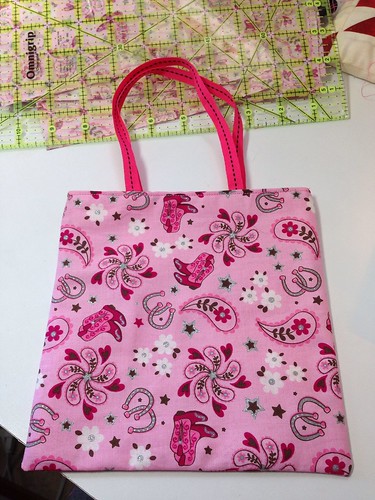
And now you have a finished gift bag!

I think one bag only took me around 20 mins.  It was really quick once I got going.  I made 12 total.  I was up and down making them throughout the day on Saturday but I think if I would have just sat and did it all in one session it might have been only a few hours.

Untitled

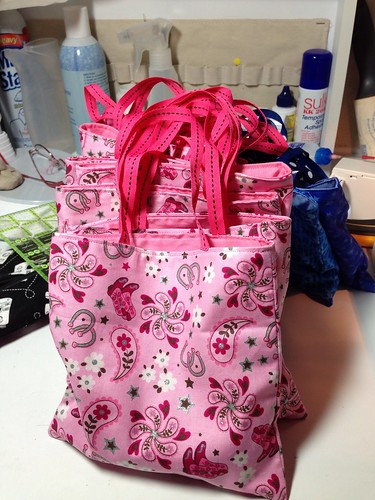
Here they are all stuffed and ready for my daughter to give out at her party.  Everyone loved them.  Well I think the girls more than the boys but they were a hit.  I will definitely make these again.  

You could definitely personalize these or make them more unique by using pieced or quilted sides, or maybe even leftover blocks from a quilt.  

Please feel free to use this tutorial for personal use only.  I would love to see what you make with it.  Its such an easy bag with so much potential.