Tuesday, April 30, 2013

Gift Bags and a tutorial!

Untitled

I was busy making gift bags this weekend for my daughter's 9th birthday party and I thought to myself that it would make a great tutorial to share on my blog.  This is my first tutorial so please let me know if anything more (or less) is needed.


Untitled

Step 1:
Supplies needed -
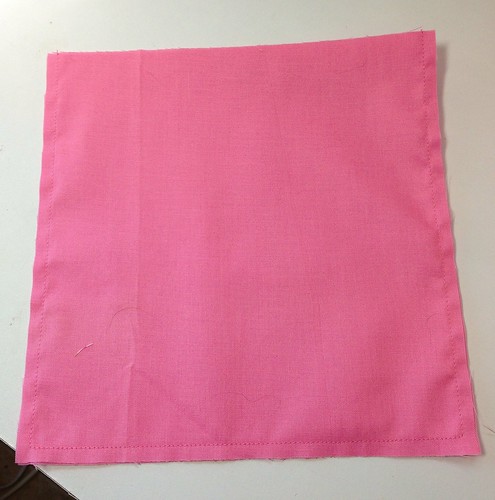
Lining - 2 - 7 1/2" Squares
Exterior - 2 - 7 1/2" Squares
             Handles - (2) 10" long pieces of ribbon.   (Just a quick note here.  I used a crossgrain ribbon.  Its woven and a little stronger and easier to sew with than the shiny kind of ribbon.  But be creative here.  You can really use anything you want.  A decorative rope or string of any kind would work.)
             Coordinating thread - I used Connecting Threads thread.  It was what I had in the color I needed.
             And general sewing supplies.  Scissors, ruler, cutting mat, pins, marking pen, etc.


Step two:
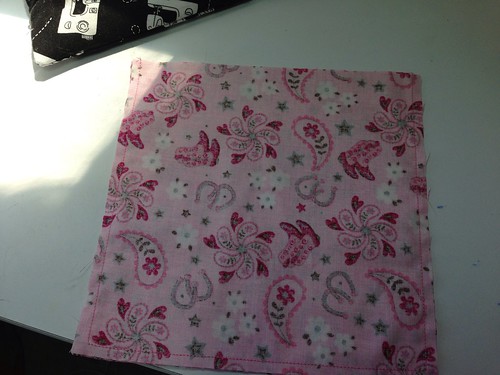
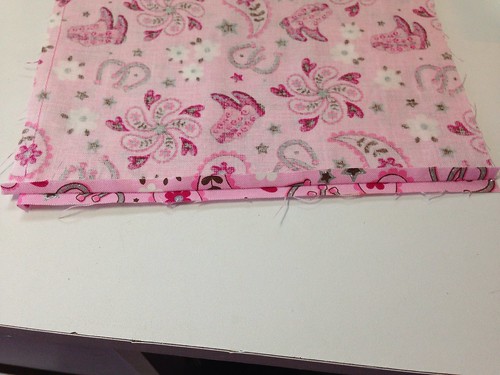
           Sew around the sides and bottom using a 1/4" seam.  Do not sew the top.  See the diagrams below.


Untitled

When you get to the corners pivot around them without stopping or cutting your thread by leaving the needle in the fabric and lifting the presser foot.  

Untitled

Untitled

Do the same thing with the lining.


Untitled

After this you are going to want to iron both pieces.  I find it easier in the end to iron my seams open.  
Untitled


Step three:

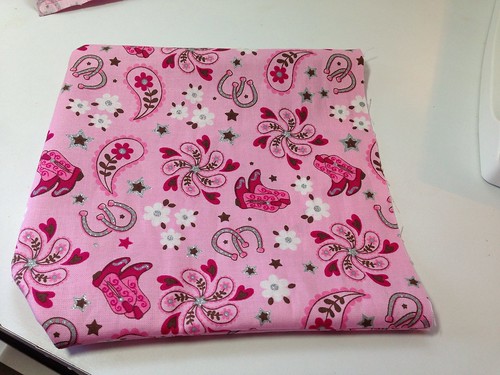
  Turn the exterior portion of the bag right side out.  You don't need to be too picky about getting the corners  just right yet.  In this step we are just attaching the handles to the bag. 


Untitled

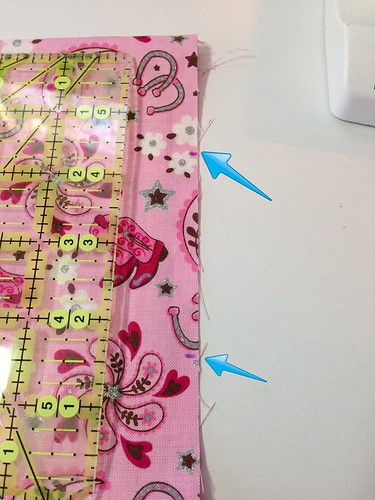
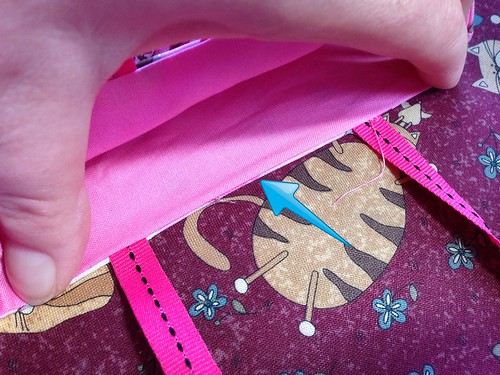
Using a ruler and a marking pen place small marks 2 inches from each edge of the bag.  This is where you are going to place your handles.  You will need to make marks on both sides of the bag.

Untitled

Untitled

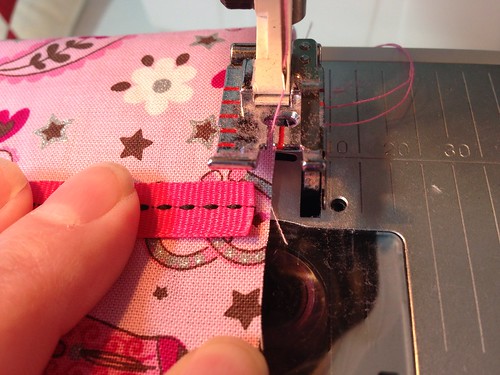
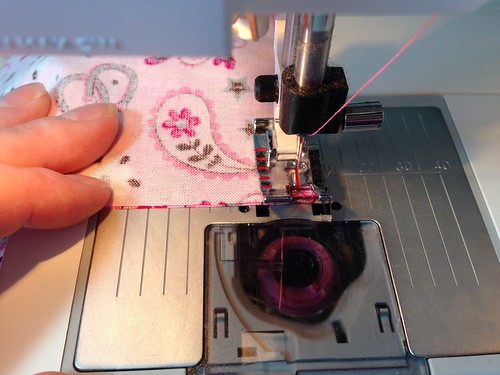
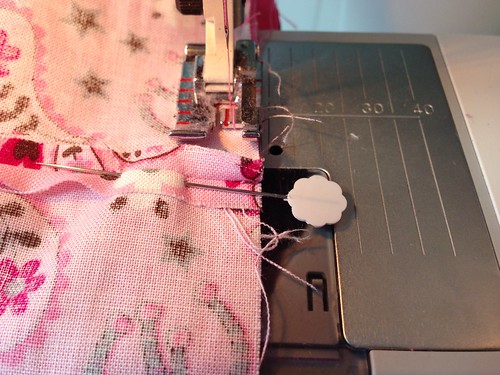
Next, we are going to attach the handles to the bag.  You can pin here but I don't.  I find the easiest way is to place your bag under the presser foot like above and then set the ribbon on top of your mark you made earlier.  I try to center it over the mark.  I find this part is easiest if you can use the free arm part of your sewing machine.  The bag fits just right around my free arm. (Believe it or not I did clean my machine before I started this but something I was using was horribly linty and I was actually making 12 bags all at once)

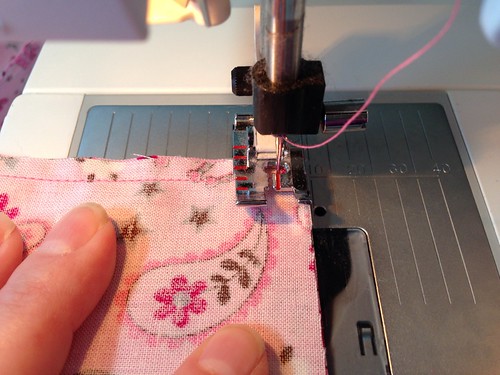
You are going to sew the ribbon to the bag using a small seam allowance.  Probably about 1/8" if you can.

Untitled

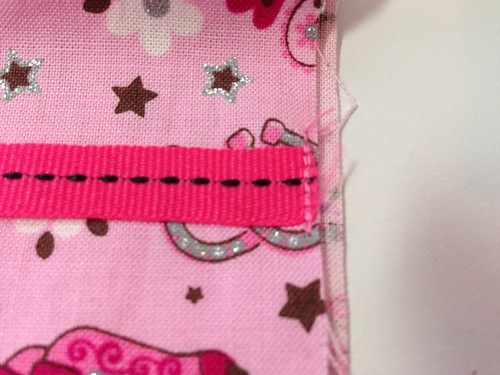
Now, you need to attach that same ribbon to the other mark on that same side of the bag.  Be careful here so that you don't twist the ribbon.  You want it to lay nice and flat.

Untitled

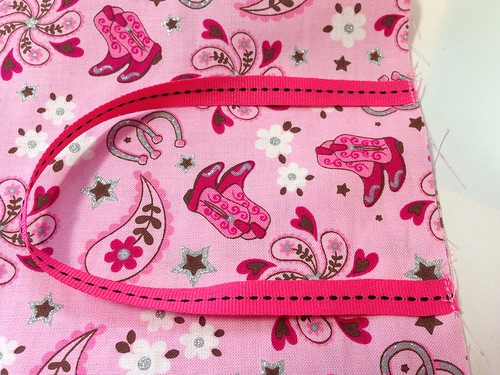
You need to do this same process again on the other side so that you have both handles attached.

Step four:

Turn the exterior of the bag so that it is inside out.
Turn the lining of the bag so that it is right side out.


Untitled

You are going to slide the lining of the bag into the exterior of the bag.

Untitled

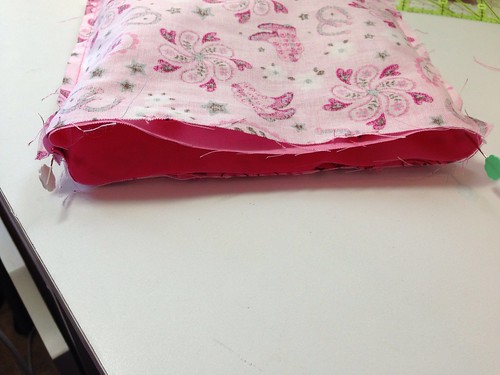
At this step you are going to need to pin the sides after lining up the seams.  This is where it is helpful if you have pressed your seams open.   You can see in the picture below how to line them up.

Untitled

I didn't take a picture of it but I found that it was easier if I used a couple more pins around the sides of the bag too.

Now, you are going to put the bag back on the sewing machine.  Now we are going to sew around the top of the bag using a 1/4" seam making sure the seams line up and stay flat on the sides.

Untitled
a>
Start at a handle and ended at the other handle on the same side leaving a few inches open for turning the bag.  I did back track at the beginning and ending of my threads so I didn't pull any out when turning the bag.

Untitled

The sewing line goes all the way around the bag.  This is another area where having a free arm is helpful.

Step five:

Untitled

Now you are going to want to turn the bag right side out pulling it through the opening you left.  If you find it too hard you can leave the opening bigger if needed.

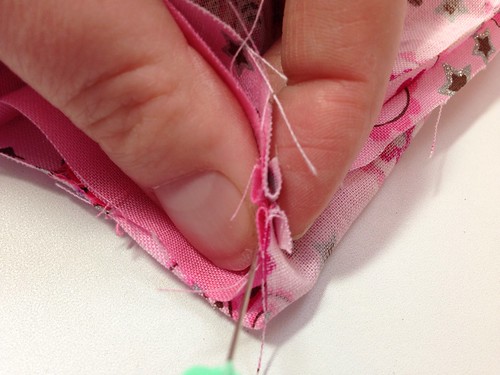
You are going to need to tuck the lining into the exterior of the bag.  It takes a bit to get the seam at the top to look nice.  I found using a pin to pull it out helped.  Play with it a few minutes and get it to where it looks nice.  When you are done you are going to want to iron around the top of the bag.  You will still have the opening there so be careful when you are ironing to make sure the edges are turned in.

Untitled

In the picture above you can see my opening after ironing around the top of my bag.  There are some small threads hanging out of it.

Untitled

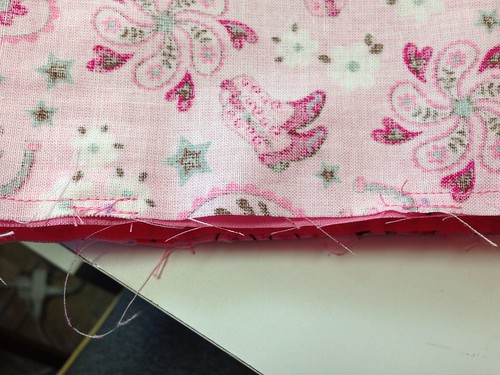
Next you are going to top stitch around the top of the bag.  This adds a nice finishing touch and closes the opening for you so you don't need to hand stitch it.  I used about an 1/8" seam.  I lined the top of the bag up with the inside of my quarter inch foot to keep it the same all around the bag.

You might need to take a pin and poke at the bottom corners to get them to look nice and be more square.


Untitled

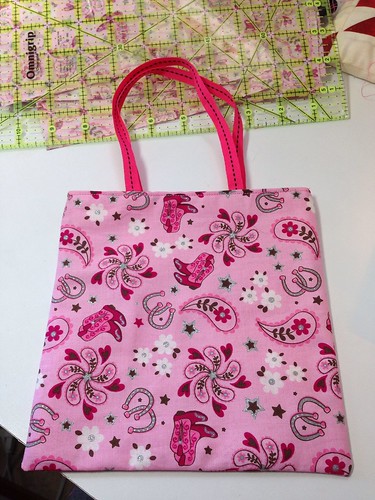
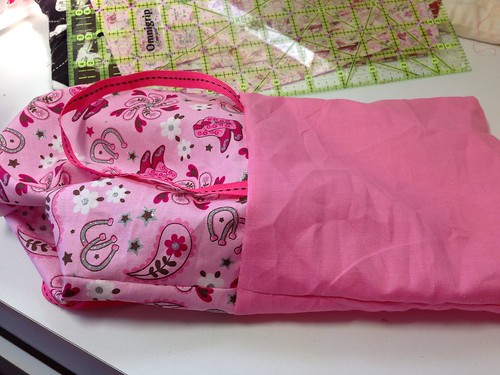
And now you have a finished gift bag!

I think one bag only took me around 20 mins.  It was really quick once I got going.  I made 12 total.  I was up and down making them throughout the day on Saturday but I think if I would have just sat and did it all in one session it might have been only a few hours.

Untitled

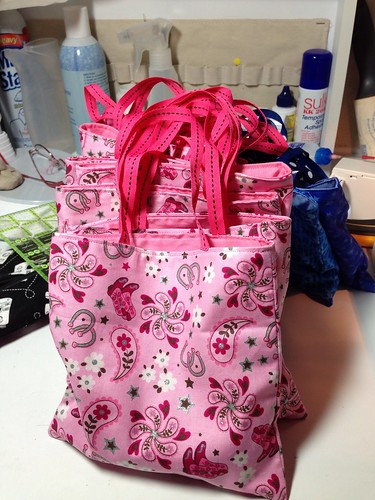
Here they are all stuffed and ready for my daughter to give out at her party.  Everyone loved them.  Well I think the girls more than the boys but they were a hit.  I will definitely make these again.  

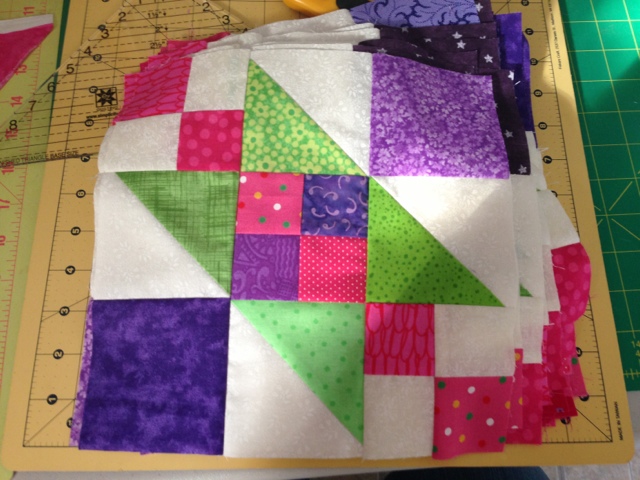
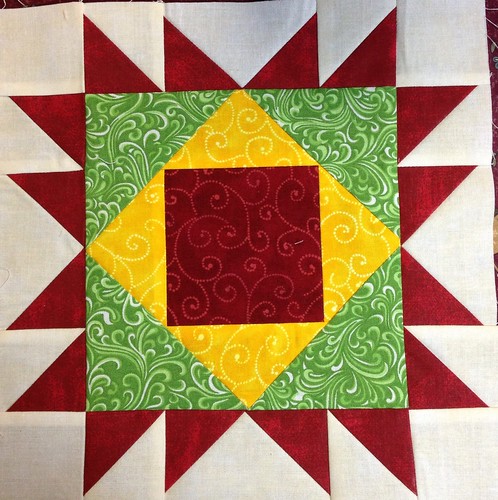
You could definitely personalize these or make them more unique by using pieced or quilted sides, or maybe even leftover blocks from a quilt.  

Please feel free to use this tutorial for personal use only.  I would love to see what you make with it.  Its such an easy bag with so much potential.    

Friday, April 26, 2013

Finish it up Friday 4/26/13

Last week was a busy, busy week.  I don't even know where to start.  Last Monday, as you probably know by now, was the Boston Marathon.  Every spring my in-laws always come to New England to support my brother-in-law in this race.  Thankfully, he was done and out of harms way when the explosions finally happened.  Facebook is an amazing thing.  About 10 mins after I heard about the explosions and after a few frantic facebook stalking moments, my brother-in-law finally posted on facebook that he and everyone he was with was ok.  Phew.  My deepest sympathies to those that were hurt.  :(  
To Boston With Love

The Vancover Modern Quilt Guild has started a drive to collect handmade flags to support the citizens of Boston.  All the details can be found here.  I plan on making at least one to send down.  I am a member of a guild but just as a floater so I am going to send them directly to the person running this drive.  The address can be found in that blog entry.

Now for my news.  I got a lot done this week!  
I finished these blocks for Bonnie Hunter's mystery, Lazy Sunday, that's in quiltmaker.  I just have to finish a few more small blocks and I will be done part 2 and all caught up.  I mentioned that this quilt was going to be twin size in the presence of my 9 year old daughter and she promptly claimed it.  And more than likely will end up with it.  


I started cutting up some more fabric for the Bonnie Hunter workshop I am attending May 3rd.  I have carpal tunnel so when a quilt has lots of tiny pieces I have to cut a little at a time.  I have asked for an Accuquilt for my birthday/anniversary in June so hopefully my husband took the hint.  :)

Jingle Belle pieced block #2


This is pieced block #2 from the free block of the month over at One Piece at a Time.  My points on the yellow aren't great so I might have to fix that.  Its bugging me.  There were a lot of seams right there.

Jingle belles appliqué #2

And this is Applique Block #2 from the same BOM.  She is releasing the next block this weekend so I am all caught up on this block of the month too!  I wish I could be caught up on all my block of the month clubs. However, I am about 6 months behind of my Dear Jane and about 3 months behind on my Baltimore and Bali.  I want to enter my Baltimore and Bali in a quilt show next year so I better get going on that.  Its all hand applique so it will take a bit of time. 

Today I am linking up to Crazy Mom Quilts.

Monday, April 22, 2013

Learn to quilt!

I just wanted to do a quick share of a blog I follow, Vintage Modern Quilts.  She is awesome and is doing a learn to quilt series.  Lesson 1 was posted today.

Lesson 1

If you have ever been interested in learning to quilt you should definitely check out her blog.


Untitled

No blog entry can be complete without a picture.  This is a little pin cushion I made this weekend out of some half square triangles that I made too small for the project I was actually working on.  I can't let blocks go to waste can I?


Wednesday, April 17, 2013

WIP Wednesday and OMG, I get to see Bonnie Hunter!

A couple weeks ago I found out that Bonnie Hunter was coming to Maine!!!  And not only was she coming to Maine but to the next town over from where I live!  Even better.  And wait for it...... it gets better.  Even though the deadline to sign up had gone by there were still spots!  How does that even happen?  Its Bonnie Hunter!  Why are there spots open???  Within about 5 seconds of finding out there was a spot I had my checkbook open.  I sent off my registration and a few days later got my confirmation!!  The class I got into was for her Jamestown Landing quilt, which I have been drooling over for forever.  Here is a link to a picture of the quilt, Jamestown Landing.  I am not sure if I can steal a picture from her page to show here so I won't.  But go click.  I'll wait.  It's gorgeous isn't it.

I have been following Bonnie's blog for about a year now.  I haven't made any of her quilts yet though I have wanted to.  I don't have much of a scrap collectionbut it is slowly building.  I did start the Lazy Sunday mystery quilt that is going on in Quiltmaker right now but I am only part way through part one.  They just released part two.  I had a few baby gifts to get done so I used it as a leader/ender project.  Another one of Bonnie's methods that you can read about here.

I have been working on my stash of blue and creams for this.  Last night I started to cut my fabrics down into strip sets.


Untitled

This is what I cut up last night.  She has asked that we have our fabrics cut in to strips so she can give us a lesson with her preferred method of making half triangle squares.  She uses the easy angle ruler.  I have used this method before but sometimes I find cutting them to be cumbersome so hopefully she gives out some good hints.  

Untitled

Here are some blues and some neutrals.  I think those darker browns may be too dark.  I am not sure but I really like them.  I am trying to decide just how much I should cut up.  The quilt we are making is a scrap quilt but there is no way I have enough scraps so I have to use my stash.  I purchased the strips I already cut above and the top row of fabrics in this picture from Connecting Threads.  They are all fat quarters and I only paid about $1.50 each for them.  Awesome prices.  

Untitled

Here are some more fabrics I set aside.

Untitled

And these are more blues from my stash.  I am going to try not to cut into these.  I am saving them for a blue and orange quilt requested by my son.  

This is my only work in progress for this week.  I just finished a baby quilt Monday night.  I only have a few days before my in-laws get here for a short visit so I thought I would use this time to get ready for this class.  It's May 3rd.  I wanted to make sure I didn't need to find more fabrics but I think I am ok for the class at least.  This is not a quilt we will finish that day.  

I am linking up to Lee at Freshly Pieced this week.  Click below to see what everyone else is working on.  


WIP Wednesday at Freshly Pieced

Tuesday, April 16, 2013

Bloglovin'


I am in search of a new blog reader since Google Reader is going away and I am trying out bloglovin'.  Click here to follow me!


Follow on Bloglovin

Friday, April 12, 2013

Finish it up Friday 4-12-2013

Yay! Its Friday!  This quilt is almost finished.  I hope that counts for a finish it up Friday post.  I only have to quilt the border and bind it.  It should be done this weekend.  Which is great since the baby its a gift for, was born Monday.  A month early.  Hey, I would have been on time if he would have stayed put.  :)  He is a cute little guy though.


upload


I found the pattern for this quilt in Quiltmaker magazine.  All of the blocks were weird sizes though so I redrafted it so the blocks were all 2" finished blocks.  This way I could make all the blocks from 2 and 1/2" strips.  I use the easy angle ruler to make all my half square triangle blocks.

upload


upload


I am linking up to Crazy Mom Quilts today.  I can't wait to see what everyone is up to this week!

Wednesday, April 10, 2013

Craftsy!!!!

I am sure all of you know by now about the great site named Craftsy.  And if you don't, you should.  Signing up for the site is free.  You get access to all sorts of free classes, paid classes and great deals on all things Crafty.  I have taken several classes with them that I absolutely loved.  One of my favorites was Bag Making Basics.  I did a blog post about the awesome zipper pouch I made here.


These are a couple I made.  I have made 5!  And I have fabric and zippers set aside for more.  They are super easy after watching the videos.  The instructor was awesome and everything was super clear.  And this was just their free class.  I have also taken a couple of machine quilting classes that I will, at some point, post reviews of.  And they were just as amazing. 

So if you haven't checked out Craftsy yet you should!


Craftsy


WIP Wednesday 4-10


This is this weeks work in progress.  Its a block from Baltimore and Bali.  I think this is the sixth block I have made.  Not sure though.  I should go back and count.  The pattern is done with all batiks but I am using cottons instead.

All I have left is to finish the orange flower and stitch down the yellow pieces on top of it.  Excuse the washed out pictures.  Its raining and cloudy so the flash is making my pictures look bad.  :(


I know these pictures are big but I wanted to show a close up of my stitches.  The section above is all done.


Here's a close up of a flower bud.  Please excuse all the fuzzies.  Black fabric picks up every little thing.


You can see in this picture that the bottom of the orange flower is not stitched down but the side is.  That's where I started.  

I turn all of my edges before stitching them down.  I have plans to do a tutorial soon on exactly how I do it.  But basically I use an applique foundation that I get at Purple Daisies.   Then I use a elmer's school glue stick to turn all the edges.  I even do all the stems that way.  The foundation is left in after you are done so I don't want the stems to look different.  After you wash a quilt that uses this foundation it puffs up and looks almost like trapunto.  Just not as puffy.  After I turn all the edges I baste it to my background with Roxanne's Basting Glue.  Love that stuff.  Now to stitch it all I have to do is grab my thread, thimble, and block and go to it.  Its so quick and easy on the go.  I love applique this way.  It took me a couple evenings to do the prep work.  I usually do it on a tv stand in front of  the tv so I can catch up on some shows at the same time.  (BTW, I watched Argo one of the nights I did this and it was such an amazing movie!!!)  

I have done needle turn but I was just never happy with the way it came out.  I am a bit of a perfectionist and could never get over the learning hump.  

A few posts ago I complained about the thread I was using.  I use Masterpiece bobbins from Superior threads.  My thread kept breaking.  It was getting frustrating so I wrote the company to see if I was doing something wrong.  And I was.  I was using too long of a strand.  And on top of that I think the foundation was fraying the thread as well.  So now I take extra care to make sure I stitch right in the fold and not get the foundation and I have had much better luck.  Still a couple breakages but so much better than before.  

This week I am linking up to Lee at Freshly Pieced.  


WIP Wednesday at Freshly Pieced